I posted about HostGIS for Linux server-based GIS the other day... Nice canned distribution, but if you want flexibility or desktop apps, you may want to try some other goodies. I am still working my way up to the whole tilecache/OpenLayers thing... I have my own AJAX WMS client that I wrote, but want to look at doing some interesting things with tile servers and some open-source backend stacks.
At any rate, tempting fate again, I decided to give Ubuntu a try, as folks were raving about Ubuntu 'dapper' (6.06).
I downloaded Ubuntu 6.10 ('edgy') and fired the ISO up in Virtual PC 2007, but found that I only got to a scrambled screen when trying to do anything with it.
Not to fear... The fix:
- At the boot screen, press F4 and select something reasonable that ISN'T in 24-bit color. I chose 800x600x16. I selected "Safe Graphics Mode" as well.
- Let Ubuntu boot up from the ISO. You still will end up with a thoroughly scrambled X screen...

- But don't panic, and don't try clicking on anything or letting the VPC session capture the mouse, you will be easily able to get a console session by pressing CTRL-ALT-F1. You should now see a console session with a prompt: ubuntu@ubuntu~$
- Enter sudo nano /etc/X11/xorg.conf - this will open the X configuration in a text editor.
- Scroll or page down untill you get to the "screen" section. You will see the default depth is set to 24 - change DefaultDepth to 16
- Enter Ctrl-O to save, answer y to save the changes, and then enter Ctrl-X to exit the text editor. This should put you back at the shell prompt.
- Enter sudo telinit 1 and wait for it to process and return to a shell prompt: root@ubuntu.
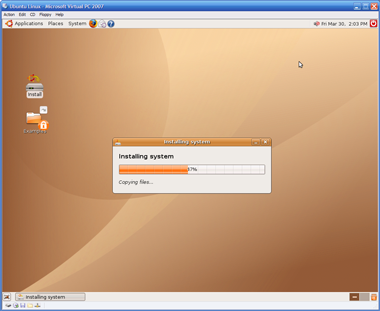
- Enter telinit 5 and the X session will return, and voila, beatiful and without being scrambled. You should be able to click on Install and go on your merry way from here on out.
- So now what? Where do I get those great Linux GIS goodies? Right from the get-go you should be able to go to Applications->Add/Remove and add in Quantum GIS (qgis).
- For more apps, you can use the Synaptics Package Manager. Go into System->Administration->Synaptics Package Manager and add some of the repositories back in and hit "Reload" and then try searching. So far, I have been playing with desktop tools - GRASS, Thuban and QGIS. All quite painless to load using the package manager.

I am certainly no Linux guru, but was nonetheless able to get this environment up and running in Virtual PC in about an hour and a half. If you're mainly a Windows guy like me, you now no longer have much of an excuse to not try these out.